Getting The Installer
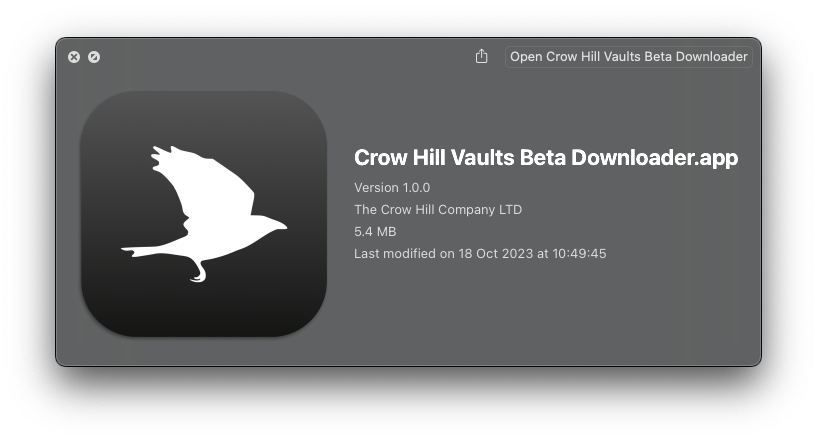
Each instrument has its dedicated download utility to assist in downloading each instrument installer. This download utility (e.g. Crow Hill Vaults Beta Downloader.app) is only a few megabytes in size and can be found directly from the product page or in your customer account on www.thecrowhillcompany.com
Opening The Downloader
Once downloaded, navigate to your download folder to open the utility. If on macOS this will be a .zip file that needs to be opened to show the .app and on Windows a .exe file.
Once you have opened the utility it will ask you to choose a desired download location.
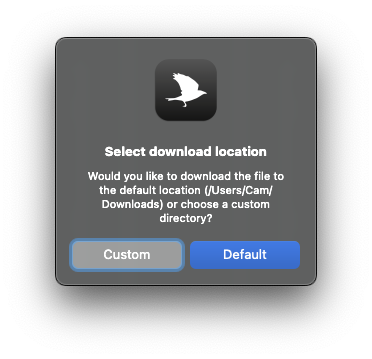
By default, this will be your Download folder, but if you are low on system disk space you can choose to download to an external drive.
Downloading
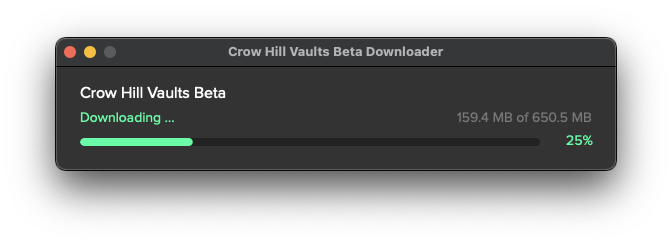
Once opened the download utility will automatically download the instruments installer and open the installer files.
!! What if the download has been completed and the installer files have not automatically opened after several minutes?
In this rare case, you can locate them in your chosen download location and open them directly by clicking on the file.
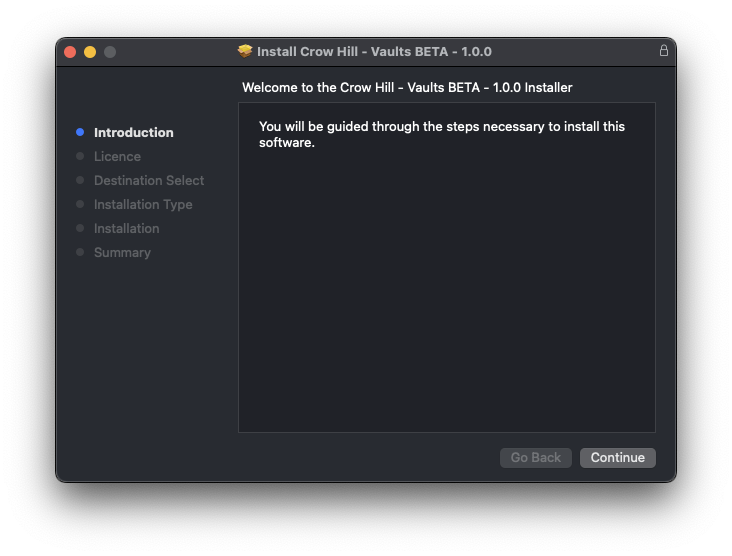
Installing
The installer has on-screen instructions to guide you through the process.
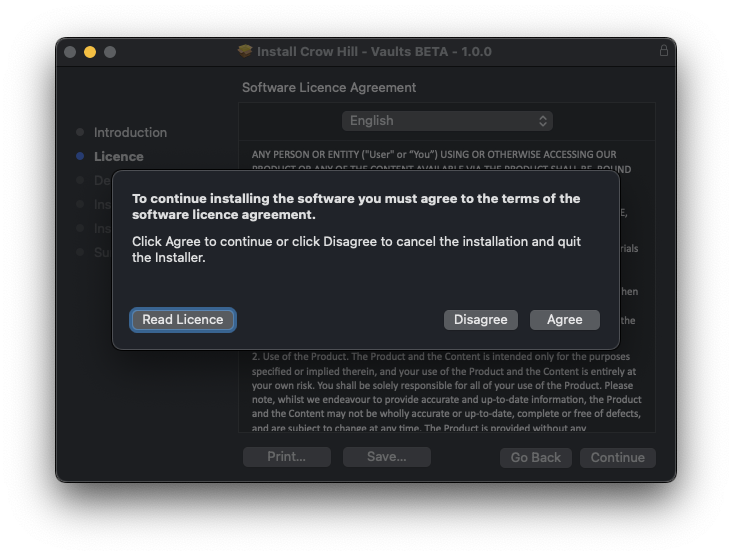
Let’s Agree On Something
By clicking continue you are shown the End-User License Agreement. To install and use Crow Hill products this agreement should be read and agreed to. This agreement can be saved for your records and can be found in each instrument’s user manual.
Clicking Agree will take you to the next stage.
Clicking Disagree will end the installation process.
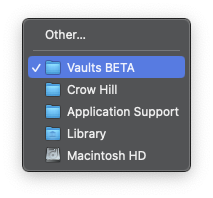
Choosing A Sample Location
When installing your instrument, you will be presented with the option to select an install location for the audio (.blob) content and to de-select unrequired plug-in formats.
The default install location for the audio content is your system drive. For smaller products, this is perfectly fine. However, if you are running low on disk space you may install your instrument on an external drive. Select your desired location from the dropdown menu and proceed as instructed.
Choosing Required Plug-In Formats
If you only require a specific format (e.g. AU) then de-selecting other formats is a great way to save on disk space.
If you are unsure what plug-in format your D.A.W (Digital Audio Workstation) requires, we suggest installing them all to ensure maximum compatibility.
By default, all formats are pre-selected.
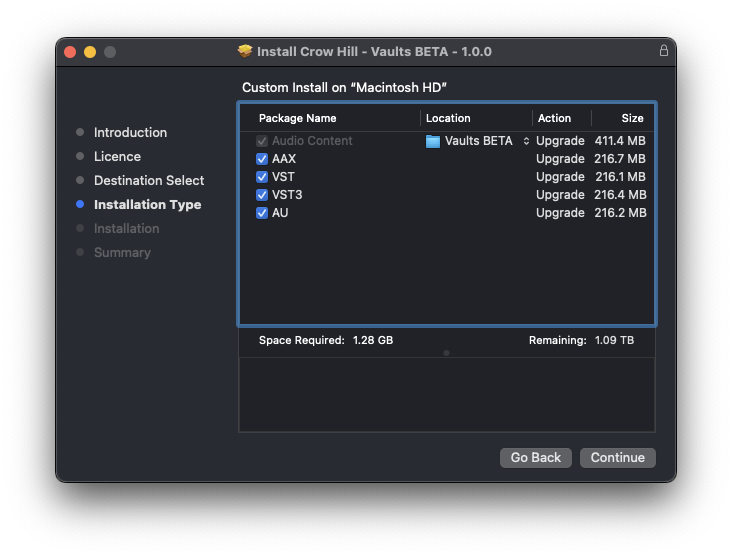
Confirming space
After clicking Continue the next screen confirms the amount of system disk space the installation will require. This is a great time to double-check check you are only installing the formats you require and if you want to use an external drive or not. To make changes to your previous selection simply select "Go Back ".
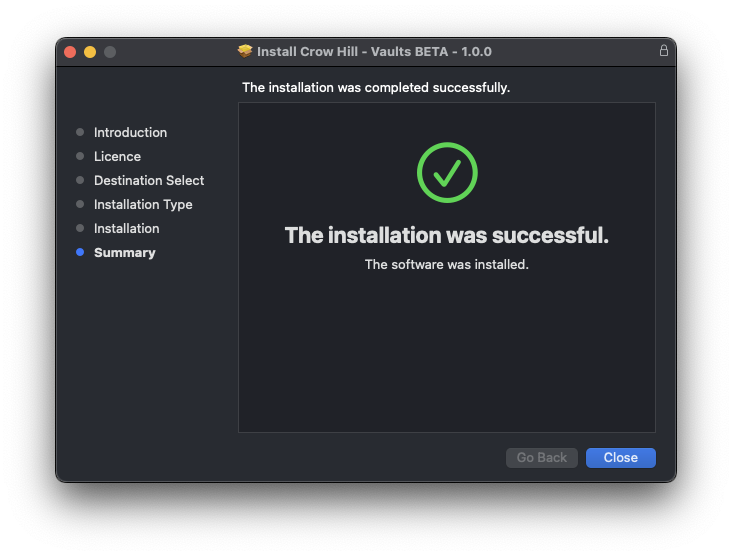
Time To Install
Once you are happy to proceed click "Install ".
Your operating system will then ask you to enter login credentials.
As the installer runs you will see onscreen progress. This process should only take several minutes with an estimated time presented throughout.
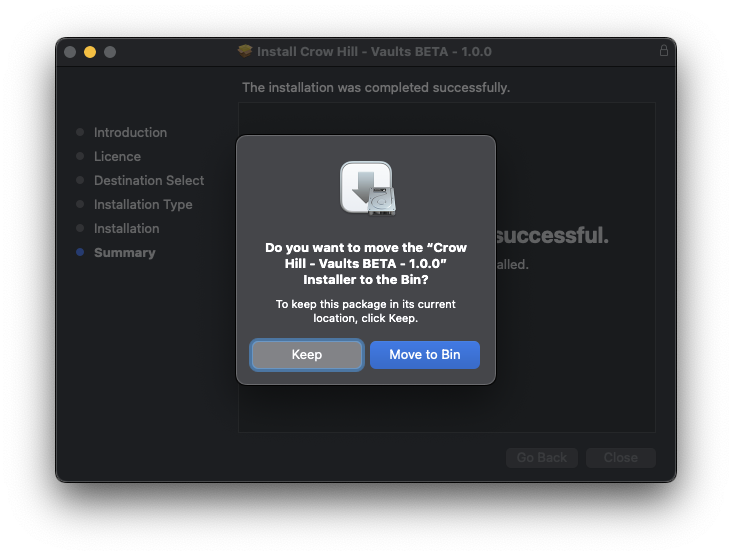
Next Steps
After a successful install your computer will ask you (macOS) whether you want to keep the installer or move it to your bin.
We suggest keeping a backup of all installers so, if needed you can use them again without having to re-download.
You are now ready to boot up your favourite audio workstation, create a new instrument track and find the Crow Hill folder to load your new Plug-In.